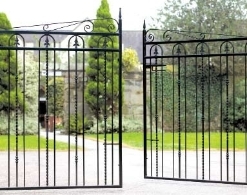
If your home benefits from metal fencing around the perimeter then it is important that they are maintained in the correct manner to ensure they remain in tip top condition and therefore continue to provide a secure boundary to your property.
Whilst they will not require the same level of care as a wooden fence, metal fencing does come with its own inherent issues that cannot be avoided. Long term exposure to the elements, wear and tear and other environmental issues will all have an impact on the condition of the fencing therefore we have compiled an easy to understand guide for the best way to maintain it.
Maintenance
We recommend that every couple of months you inspect your fencing to look for signs of impact damage, rust, flaking paint or simply a build up of dirt.
Damage – If any of the metal bars or scrollwork become bent it may be possible to bend it back to shape with the use of a hammer or vice. For major damage this will need to be cut out and rewelded so will likely require the use of a professional.
Rust – Water can have a detrimental effect on the metal work and over time if left unchecked will lead to unsightly rust appearing on the surface. Minor rust can be removed with a wire wool but for heavier rust you will need to invest in specialist rust eating liquid that it painted on to the surface.
Build-up of Dirt – Bird droppings, grit and other particles in the environment can build up and adhere to the surface of the fencing which not only looks unsightly but can also eat the paintwork leading to issues with rust. To overcome this issue, more often than not, soap and water and a quick clean with a cloth is all that is required to keep the fence looking good as new.
Paint Chips – If you spot any signs of paint chips these can be touched up with the appropriate paint to prevent further issues.
Painting
If your metal fencing has seen better days and is in need of a total repaint then this is a major job that should not be undertaken lightly. Whilst it is fiddly and time consuming, it will breath a whole new life to the boundary of your property and well worth the effort.
Here we outline the process:
Remove Dirt and Rust
To achieve professional results and a long-lasting finish it is essential that any existing rust, dirt, grime and residue is completely removed prior to commencing painting. This is a slow task and time should be taken to ensure all parts of the metal work are scrubbed and sanded to provide a good key for the primer.
Wash Down
Once you are happy that all rust has been removed and a smooth finish has been achieved, it is advisable to wash down the fencing with soap and water. This will remove dust build up. Once this is done make sure to dry the surfaces down completely.
Apply Primer
For a long-lasting finish, we recommend the entire surfaces of the metal fencing is painted with a primer as this will give a good key for the top coat to adhere to. If the fencing is not galvanised, a rust inhibiting primer is recommended.
Apply the Top Coat
Once the primer has been allowed sufficient time to dry (following the instructions on the tin) it is then time to apply the top coat. Ensure that all surfaces are evenly coated and look out for runs which will look unsightly when dried. Once this process has been completed once, we recommend a second coat is applied following the same process as before.


